Capturing Solar Farms with Avata: Wind Guide
Capturing Solar Farms with Avata: Wind Guide
META: Master solar farm capture in windy conditions with DJI Avata. Expert tips on stabilization, flight patterns, and D-Log settings for professional results.
TL;DR
- Avata's compact design and propeller guards make it ideal for navigating tight spaces between solar panel rows in gusty conditions
- Sport Mode combined with manual exposure delivers cinematic footage even in winds up to 10.7 m/s
- D-Log color profile preserves highlight detail on reflective panel surfaces while maintaining shadow information
- Strategic flight patterns and low-altitude passes minimize wind exposure while maximizing coverage efficiency
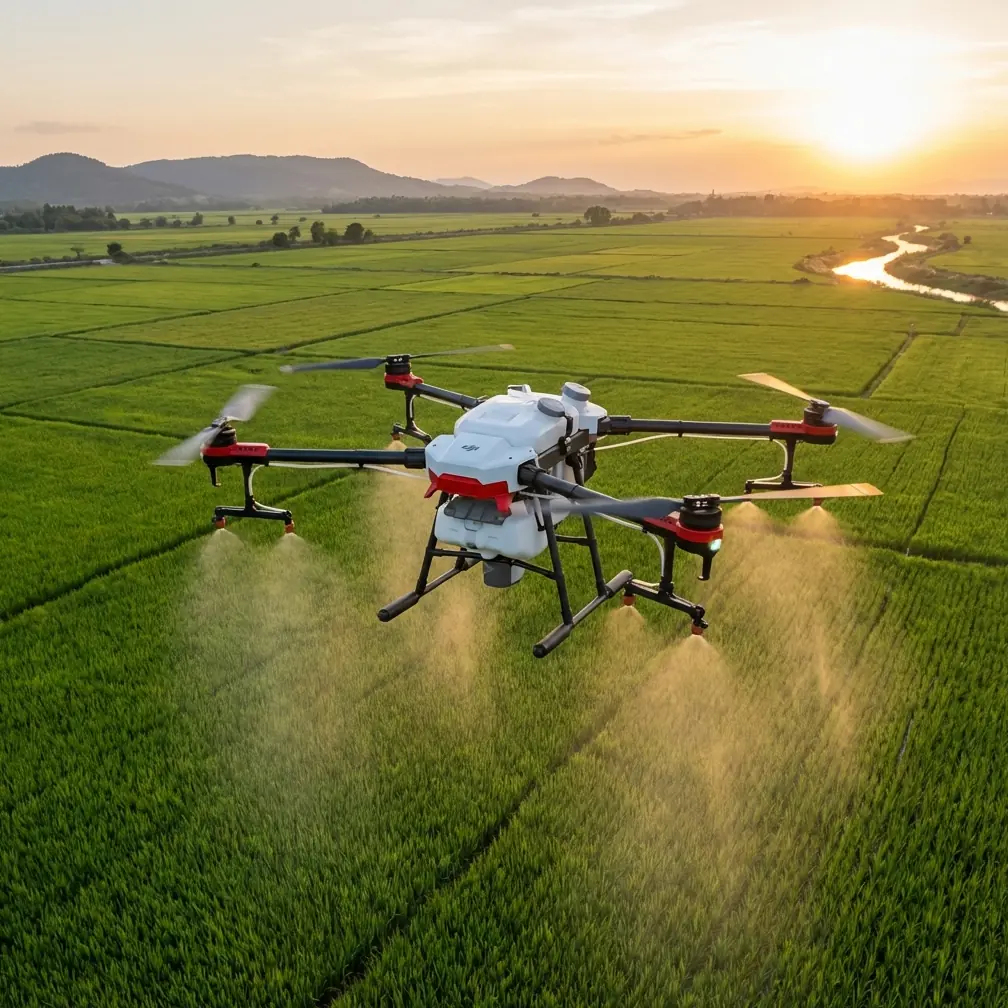
Solar farm documentation presents unique challenges that most drones struggle to handle. Reflective surfaces create exposure nightmares, endless rows demand precise navigation, and open terrain means relentless wind buffeting your aircraft. The DJI Avata transforms these obstacles into manageable tasks through its cinewhoop-style design and intelligent flight systems.
Last summer, I faced a 47-acre solar installation in West Texas where sustained winds hit 25 mph daily by 10 AM. Traditional inspection drones became nearly unusable, drifting off course and producing unusable shaky footage. Switching to the Avata changed everything—its ducted propellers and low profile cut through gusts that grounded larger aircraft.
This guide breaks down exactly how to capture professional solar farm footage with your Avata when wind becomes your biggest adversary.
Understanding Avata's Wind Performance Characteristics
The Avata handles wind differently than conventional camera drones. Its cinewhoop design positions the propellers within protective ducts, creating a more aerodynamic profile that slices through crosswinds rather than fighting them.
Key Specifications for Wind Operations
| Specification | Avata Value | Impact on Solar Farm Work |
|---|---|---|
| Max Wind Resistance | 10.7 m/s (Level 5) | Handles moderate gusts common in open terrain |
| Weight | 410g | Light enough for agile corrections, heavy enough for stability |
| Max Speed (S Mode) | 97 km/h | Overcomes headwinds during long row passes |
| Hover Accuracy (GPS) | ±0.5m vertical, ±1.5m horizontal | Maintains position for panel close-ups |
| Flight Time | 18 minutes | Plan for 12-14 minutes of actual capture time in wind |
The ducted propeller system provides approximately 15% more thrust efficiency compared to exposed props of similar size. This translates directly into better attitude hold when gusts try to push you off course.
Expert Insight: Wind resistance ratings assume optimal battery charge. Below 40% battery, the Avata's ability to fight wind decreases noticeably. In challenging conditions, I land at 35% rather than pushing to the standard 20% warning threshold.
Pre-Flight Planning for Windy Solar Farm Shoots
Successful solar farm capture starts hours before you arrive on site. Wind patterns at ground level differ dramatically from conditions at your typical 15-30 meter operating altitude.
Weather Assessment Protocol
Check multiple forecasting sources focusing on:
- Sustained wind speed (target below 8 m/s for best results)
- Gust differential (gusts more than 5 m/s above sustained speed cause problems)
- Wind direction relative to panel rows (crosswinds are harder than headwinds)
- Thermal activity timing (morning flights before 10 AM typically offer calmer air)
Solar installations create their own microclimate. Dark panel surfaces absorb heat, generating thermal updrafts that begin around mid-morning. These thermals combine with ambient wind to create turbulent, unpredictable conditions.
Site Survey Considerations
Before launching, identify:
- Inverter stations and electrical infrastructure (maintain safe distances)
- Guy wires, fencing, and monitoring equipment (obstacle avoidance helps but isn't foolproof)
- Emergency landing zones between panel rows
- Wind shadow areas created by equipment buildings or tree lines
The Avata's obstacle avoidance sensors provide downward and backward detection, but solar panels present unique challenges. Their flat, reflective surfaces can confuse sensors, especially when sun angle creates glare.
Camera Settings Optimized for Reflective Surfaces
Solar panels are essentially giant mirrors angled toward the sky. Standard auto-exposure settings will hunt constantly as your aircraft moves across varying reflection angles.
Recommended Manual Settings
Lock these parameters before takeoff:
- Resolution: 4K/60fps for maximum flexibility in post
- Color Profile: D-Log for 13+ stops of dynamic range
- ISO: 100-200 (keep as low as possible)
- Shutter Speed: Double your frame rate (1/120 for 60fps)
- White Balance: Manual at 5600K for daylight consistency
D-Log captures the extreme contrast between shadowed ground beneath panels and bright reflective surfaces above. This profile requires color grading in post-production but preserves detail that standard color profiles clip permanently.
Pro Tip: Add a ND8 or ND16 filter to maintain proper shutter speed in bright conditions. The Avata's small sensor benefits from the motion blur that correct shutter speeds provide—footage looks more cinematic and hides minor wind-induced vibrations.
Exposure Strategy for Panel Rows
Expose for the panels themselves, not the surrounding terrain. Underexposed ground recovers easily in editing, but blown-out panel highlights cannot be restored.
Use the histogram display in your goggles or controller screen. Aim for highlight peaks that stop just short of the right edge, indicating you're capturing maximum brightness without clipping.
Flight Patterns That Minimize Wind Impact
Strategic flight planning reduces the time your Avata spends fighting wind while maximizing useful footage captured.
The Crosswind Crab Technique
When wind blows perpendicular to panel rows:
- Fly into the wind on your outbound passes
- Let wind assist your return passes
- Angle your nose slightly upwind while maintaining straight camera orientation
- Use Subject tracking to keep panels centered despite crabbing angle
This technique reduces battery consumption by 20-25% compared to fighting crosswinds in both directions.
Low-Altitude Advantage
Ground effect and panel rows themselves create wind shadows at low altitudes. Flying at 3-5 meters above panel height places you in calmer air while still capturing comprehensive coverage.
The Avata excels at these low passes. Its propeller guards mean accidental contact with panel edges or mounting hardware won't result in catastrophic crashes—you'll bounce off and recover rather than losing the aircraft.
QuickShots and Automated Patterns
While QuickShots work in calm conditions, avoid automated flight modes in significant wind. The Avata's automated patterns don't account for wind compensation, resulting in:
- Asymmetrical circles and orbits
- Inconsistent speed through frame
- Potential drift outside safe operating areas
Manual control with ActiveTrack assistance provides better results. Lock onto a specific panel section and fly your own pattern while the gimbal maintains subject framing.
Hyperlapse Techniques for Installation Documentation
Solar farm Hyperlapse footage creates compelling before/after documentation and marketing content. The Avata's stabilization handles these long-exposure sequences surprisingly well given its compact size.
Optimal Hyperlapse Settings
- Interval: 2 seconds for smooth motion
- Duration: Minimum 30 minutes for usable sequences
- Direction: Fly with prevailing wind, not against it
- Altitude: Higher altitudes (40-50 meters) reduce visible position drift
Wind creates micro-movements between frames that appear as jitter in final Hyperlapse output. The Avata's 3-axis gimbal compensates for most of this, but extreme gusts still cause visible jumps.
Schedule Hyperlapse captures during the calmest portion of your weather window, typically early morning or late afternoon when thermal activity subsides.
Common Mistakes to Avoid
Ignoring battery temperature: Cold batteries in morning shoots reduce capacity by up to 30%. Warm batteries to 20°C minimum before flight.
Trusting obstacle avoidance completely: Solar panel reflections confuse sensors. Maintain manual awareness of your surroundings regardless of what the system reports.
Fighting wind instead of working with it: Plan flight paths that use wind assistance rather than constant opposition. Your footage quality and flight time both improve.
Overexposing for shadow detail: Blown highlights on panel surfaces look unprofessional and cannot be fixed. Protect highlights, recover shadows in post.
Launching from unstable surfaces: Gravel, grass, or uneven ground near solar installations causes takeoff drift. Carry a portable landing pad for consistent launches.
Neglecting compass calibration: Large solar installations contain significant metal infrastructure. Calibrate at your actual launch point, not in the parking area.
Frequently Asked Questions
Can the Avata's obstacle avoidance detect solar panel edges reliably?
The downward and backward sensors work adequately for large obstacles but struggle with thin panel edges and mounting hardware. Solar panel glass surfaces can also create false readings due to reflection. Treat obstacle avoidance as a backup system, not primary collision prevention. Maintain visual awareness and conservative clearances, especially when flying between rows.
How does D-Log compare to Normal color profile for solar farm work?
D-Log captures approximately 3 additional stops of dynamic range compared to Normal profile, critical for scenes containing both shadowed ground and reflective panels. The flat, desaturated D-Log footage requires color grading but preserves highlight and shadow detail that Normal profile clips permanently. For professional documentation, D-Log is essential despite the additional post-processing time.
What's the minimum safe distance from active electrical infrastructure?
Maintain minimum 10 meters from inverter stations, transformer equipment, and high-voltage connections. Electromagnetic interference from this equipment can affect compass accuracy and GPS reception. Additionally, some facilities require 30+ meter clearances per their safety protocols—always confirm site-specific requirements with facility management before flying.
Mastering solar farm capture with the Avata requires understanding both the aircraft's capabilities and the unique challenges these installations present. Wind will always be a factor in open terrain, but proper technique transforms it from a flight-ending obstacle into a manageable variable.
The combination of protected propellers, capable stabilization, and D-Log color science makes the Avata surprisingly effective for this demanding application. Start with shorter flights in moderate conditions, build your confidence with the aircraft's handling characteristics, and gradually expand into more challenging scenarios.
Ready for your own Avata? Contact our team for expert consultation.