Flying Avata Near Windy Power Corridors: What the Survey
Flying Avata Near Windy Power Corridors: What the Survey Standard Gets Right About Real-World Mission Discipline
META: Practical Avata guidance for windy power-line work, grounded in low-altitude digital aerial photogrammetry standards, control-point discipline, image clarity, and field calibration habits.
Wind changes everything around power lines.
Not just the way a small drone moves, but the way you plan, frame, verify, and decide whether a shot is usable at all. If you are trying to work with an Avata in a power-corridor environment, the usual consumer-drone advice is too shallow. Windy transmission routes create a stacked problem: unstable air, visual clutter, electromagnetic disturbance, narrow safety margins, and image-quality penalties that show up later when you are back at the screen.
That is why one of the most useful lenses for thinking about Avata operations near power infrastructure does not come from marketing language. It comes from a low-altitude digital aerial photogrammetry field standard: technical design must be written to a formal specification, and all instruments must be inspected and calibrated within their valid certification period. That sounds dry until you have flown a route where one unstable compass reading or one soft control image ruins the value of the sortie.
For an Avata pilot, especially one using the platform for visual documentation, training, corridor familiarization, or close-range inspection support, those requirements translate into something very practical: stop treating the flight as a freestyle event. Treat it as a measured field job.
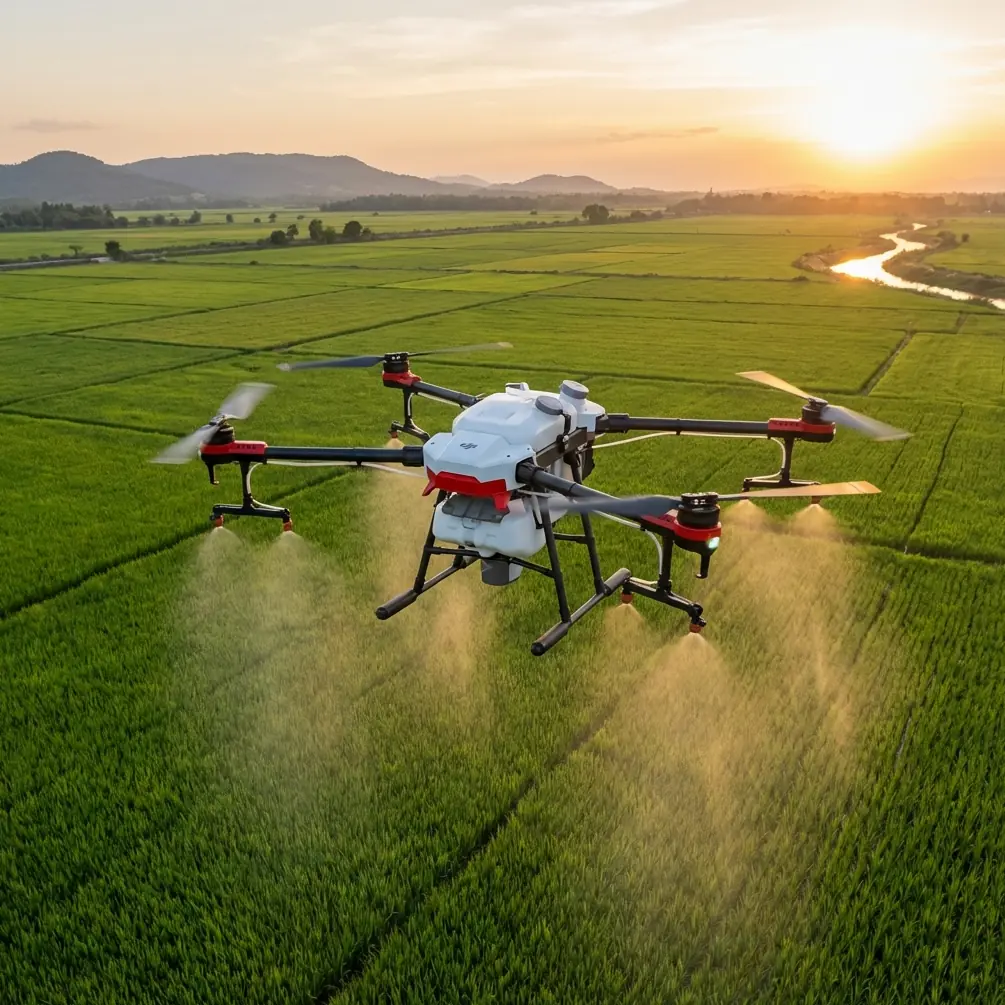
The problem with power-line flights in wind
Power corridors are deceptive. From the ground, the route can look open and forgiving. In the goggles or on the monitor, it becomes a different landscape. Crosswinds bend your intended line. Terrain funnels gusts. Towers create localized turbulence. Conductors and hardware complicate your visual composition. If you are trying to capture stable, readable footage or repeated angles for infrastructure review, every correction you make in the air has a quality cost.
With Avata, that cost often appears in three places:
- Inconsistent framing
- Reduced image interpretability
- Navigation disturbances near electrical infrastructure
The reference standard is surprisingly relevant here because it places heavy emphasis on planning around the actual mapping conditions: map scale, ground resolution, terrain characteristics, real subdivision of the survey area, and distribution of image coverage all need to be considered together before choosing an implementation plan.
Even if your Avata mission is not a formal mapping flight, the same logic applies. You should not launch just because the battery is ready and the weather seems “flyable.” You should define what level of detail you need from the footage, what corridor segment matters most, what terrain-induced wind you expect, and how image overlap or repeatability will be preserved when the aircraft is being pushed off line.
That is not bureaucracy. It is the difference between returning with useful corridor documentation and returning with footage that looks cinematic but tells the asset team very little.
A forgotten operational lesson: image targets must be clear and measurable
One of the most valuable details in the source standard concerns photo control point selection. It says the target image should be clear, easy to identify, and suitable for stereoscopic measurement. It even gives concrete characteristics: features with good intersection angles, roughly 30° to 150°, are preferred, while deformed features and shadows should not be selected as point targets. It also specifies that point features should be distinct enough in the original image, and mentions a threshold tied to image size, including a 3 × 3 pixel reference for point-like targets.
This matters more for Avata power-line work than many pilots realize.
When flying in wind, people often chase stability by increasing speed on one pass and slowing dramatically on another. The result is footage with variable motion blur, shifting perspective, and inconsistent target readability. If your real goal is to inspect attachment points, insulator strings, vegetation encroachment zones, or right-of-way landmarks, then visual clarity is not a luxury. It is the job.
The standard’s emphasis on target clarity tells us something fundamental: not every visible object is a good visual reference. Near power lines, shadows from towers, narrow conductors against mixed backgrounds, and reflective hardware can all look obvious in flight and become much harder to interpret later. For Avata pilots, this means you should favor repeatable, high-contrast corridor reference features when building your route and camera behavior.
In practice:
- Use tower legs, access-road intersections, and fixed ground features as repeatability anchors.
- Avoid judging success from the live view alone when glare or shadow cuts across the frame.
- If wind is forcing aggressive attitude corrections, reduce ambition and capture fewer but cleaner runs.
Avata’s agility helps, but agility does not rescue poor target discipline.
Why edge placement and composition matter in gusts
Another technical point from the standard is easy to overlook: the point location should not be too close to the image edge, with a cited minimum of 150 pixels from the photo boundary. In formal photogrammetry, this protects the quality and reliability of measurement. In Avata operations, the operational significance is broader.
When you are flying along a power corridor in wind, your composition drifts. The subject you intended to hold in the center may slide toward the frame edge during a gust or during a manual correction. Near the edge, distortion, motion ambiguity, and reduced interpretability become more likely. If the point of interest is a spacer, clamp, or crossarm detail, edge framing can make the clip far less useful.
That means a disciplined Avata operator should build margin into the shot. Do not frame the conductor or hardware right at the side of the image just because it looks dynamic in the goggles. Leave room. Wind will use it.
This is where some of the popular feature language around drones can mislead people. Obstacle avoidance and subject-oriented flight tools can reduce workload in some environments, but around power infrastructure, composition discipline still depends on the pilot’s anticipation. QuickShots and Hyperlapse have their place for broad corridor storytelling or training debrief visuals, but they are secondary. The mission-critical question is whether the important visual element stays clean, centered enough, and readable enough for later review.
Calibration is not optional when electromagnetic interference enters the picture
The standard also states that all instruments and equipment used in the work should be inspected and calibrated, and they must remain within a valid inspection period. This is one of those rules that sounds administrative until you work near energized infrastructure.
Power-line environments can expose weak habits quickly. Electromagnetic interference may not always create a dramatic failure, but it can influence confidence in heading behavior, signal quality, and pilot trust in what the aircraft is telling them. With an Avata, that often shows up as a subtle mismatch between expected orientation and actual aircraft response.
The narrative spark here is antenna adjustment, and it is a real one.
When working near power lines in wind, I have seen pilots blame everything on the aircraft when the real issue was poor controller antenna orientation combined with a compromised standing position. If the corridor bends, the pilot remains static, and the antenna angle no longer favors the aircraft’s path, link robustness can suffer at exactly the wrong moment. Add electrical infrastructure in the environment and the pilot may interpret normal signal degradation as mysterious interference.
A better response is procedural:
- Check the aircraft, controller, firmware state, and calibration status before the mission.
- Choose a pilot position that preserves line-of-sight as the route progresses.
- Adjust antenna orientation deliberately as the aircraft changes relative position, rather than locking into one posture.
- If interference warnings appear or heading confidence degrades, back out and reset instead of pressing deeper into the corridor.
That is where the old survey mindset proves its value. Calibration is not a checkbox. It is a way of reducing false interpretation. If your compass, IMU confidence, or visual judgment is already strained by wind and infrastructure geometry, you do not want avoidable uncertainty in the stack.
Regional planning logic applies even to a small FPV-style platform
The source standard discusses how a regional network should be divided based on several interacting variables and says the shape should be determined according to precision needs and the characteristics of the aerial material. It also references spacing logic for adjacent control points and flight lines, including examples such as 1:500 and 1:1000 scale-related spacing considerations.
You may never run a formal control network with an Avata, but the concept is highly transferable.
A power-line route should be divided into segments before flight. Not mentally. On paper or on-screen.
For example:
- tower-to-tower sections with distinct wind exposure
- bends in the corridor
- sections with dense vegetation
- spans near access roads where ground reference is strong
- visually difficult sections with poor background contrast
That segmentation mirrors the standard’s idea that implementation must suit local conditions, not just general rules. It also creates better decision points. If the wind is manageable in one span and chaotic in the next, you do not have to treat the route as a single uninterrupted mission.
For Avata operators capturing footage for inspection support, this can dramatically improve consistency. You can vary altitude, speed, and camera intent by segment instead of improvising continuously. If you are recording in D-Log for grading flexibility, that consistency also helps in post. Exposure and color latitude are useful, but they cannot fix a poorly segmented flight plan.
How to fly cleaner around power lines with Avata
The best Avata corridor work often looks less dramatic during the mission and more valuable afterward.
Here is a field-tested way to approach it:
1. Define the visual objective before launch
Are you documenting overall corridor condition, specific structure components, vegetation interface, or route access? If the answer is vague, the footage will be vague too.
2. Choose fixed visual anchors
Use stable, recognizable features instead of relying on the conductors themselves as the only guide. The standard’s preference for clear, well-defined targets is a reminder that ambiguous references create weak outputs.
3. Leave composition margin
That 150-pixel edge-distance idea is useful beyond formal mapping. In windy conditions, center your critical subject with room to spare so the inevitable drift does not degrade the shot.
4. Fly shorter sections
Segment the corridor the way a survey team segments a region. This reduces cumulative error, fatigue, and bad decision-making.
5. Adjust antennas as part of piloting
Do not set and forget. If you are moving along a line, body orientation and antenna angle are part of signal management. If you need a second opinion on setup logic for your corridor environment, you can message a technical flight advisor here: https://wa.me/85255379740.
6. Respect soft warnings
A small heading inconsistency, unstable live view, or unexpected drift near infrastructure is enough reason to pause. Near power lines, doubt compounds quickly.
7. Use automation selectively
ActiveTrack-style thinking works best in open, predictable spaces. Around utility structures, pilot judgment matters more than automated convenience. The same goes for QuickShots. Save them for explanatory context footage, not core documentation.
The photographer’s perspective: what actually makes footage useful
From a photographer’s standpoint, Avata is at its best when the pilot understands that movement is not the story. Readability is.
Power-line footage has to survive scrutiny. Someone may need to review hardware alignment, surrounding vegetation, route conditions, or maintenance access context. In that setting, smooth enough flight, stable enough horizon control, and deliberate target treatment matter more than flashy pathing.
That is why the standard’s hierarchy is so revealing. When target conditions conflict with image conditions, the source says priority should be given to the target condition. Operationally, that is a powerful rule for Avata users. If the prettier angle makes the important feature harder to read, take the less pretty angle. If the low pass looks exciting but increases subject ambiguity, raise the profile and simplify the shot.
This mindset also helps with post-production. D-Log can preserve tonal flexibility, but no color workflow can restore a target that was obscured by shadow, blur, or rushed framing. Hyperlapse can explain corridor scale, but it cannot substitute for clean reference passes. Subject-oriented tools can help maintain framing in benign conditions, but around towers and wires, confidence still comes from controlled manual intent.
Avata is capable, but standards thinking makes it dependable
The strongest takeaway from the reference material is not about a single formula or spacing table. It is about discipline.
A low-altitude aerial imaging job should be designed according to purpose. Equipment should be checked and calibrated. Targets should be selected for clarity and measurability. Regional conditions should shape execution. Margins should be built into the image. Those principles were written for formal aerial photogrammetry, yet they map remarkably well onto a modern Avata workflow near windy power lines.
If you apply them, the aircraft stops being just a nimble camera in the air. It becomes part of a repeatable field method.
And that is what separates a risky, improvised corridor flight from a professional one.
Ready for your own Avata? Contact our team for expert consultation.