How to Film Mountain Venues with DJI Avata
How to Film Mountain Venues with DJI Avata
META: Master mountain venue filming with DJI Avata. Learn pro techniques for obstacle avoidance, subject tracking, and cinematic shots in challenging alpine terrain.
TL;DR
- Pre-flight sensor cleaning is critical for reliable obstacle avoidance in dusty mountain environments
- D-Log color profile captures maximum dynamic range for dramatic alpine lighting conditions
- ActiveTrack and QuickShots enable professional venue coverage with minimal pilot workload
- Hyperlapse mode creates stunning time-compressed mountain venue establishing shots
Why the DJI Avata Excels at Mountain Venue Filming
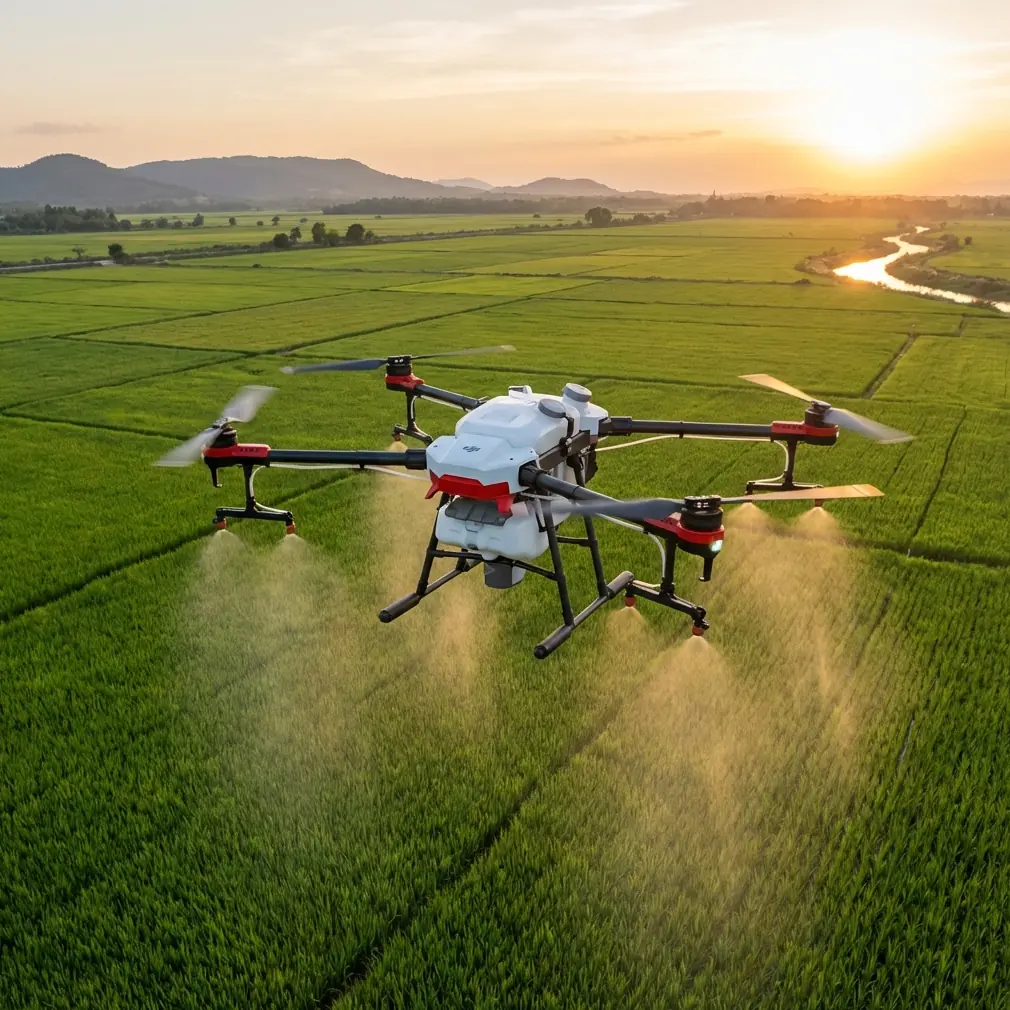
Mountain venues present unique filming challenges that demand specialized equipment. The DJI Avata's compact design, immersive FPV experience, and intelligent flight features make it exceptionally suited for capturing dramatic alpine locations.
Whether you're documenting a wedding venue, scouting a film location, or creating promotional content for a mountain resort, the Avata delivers cinematic results that larger drones simply cannot achieve in confined spaces.
This guide walks you through my proven workflow for capturing professional mountain venue footage—from essential pre-flight preparation to advanced shooting techniques.
Pre-Flight Preparation: The Cleaning Step That Saves Your Shot
Before discussing flight techniques, let's address the most overlooked aspect of mountain filming: sensor maintenance.
Mountain environments expose your Avata to dust, pollen, and fine particulates that accumulate on obstacle avoidance sensors. A single dirty sensor can trigger false obstacle warnings or—worse—fail to detect actual hazards.
My Pre-Flight Sensor Cleaning Protocol
Here's the exact routine I follow before every mountain venue shoot:
- Inspect all four downward vision sensors using a bright flashlight at an angle
- Clean with a microfiber cloth dampened with lens cleaning solution
- Check the forward-facing sensors for debris, condensation, or smudges
- Verify sensor functionality by powering on and checking the DJI Fly app's sensor status display
- Allow sensors to acclimate to ambient temperature for 5-10 minutes before flight
Pro Tip: Mountain temperature swings cause condensation on cold sensors brought from warm vehicles. I keep my Avata in an insulated case and allow gradual temperature equalization before removing it.
This cleaning routine takes under three minutes but has saved countless shots from unexpected obstacle avoidance malfunctions.
Essential Camera Settings for Alpine Conditions
Mountain lighting creates extreme dynamic range challenges. Bright snow, deep shadows, and rapidly changing conditions require specific camera configurations.
Optimal Settings for Mountain Venue Work
| Setting | Recommended Value | Rationale |
|---|---|---|
| Color Profile | D-Log | Maximum dynamic range for post-processing |
| Resolution | 4K/60fps | Flexibility for slow-motion and cropping |
| ISO | 100-400 | Minimize noise in shadow recovery |
| Shutter Speed | 1/120s (at 60fps) | Maintains 180-degree shutter rule |
| White Balance | Manual (5600K) | Consistency across changing conditions |
| ND Filter | ND16-ND64 | Essential for bright alpine conditions |
Why D-Log Matters in Mountains
The D-Log color profile captures approximately 13 stops of dynamic range, compared to roughly 11 stops in standard color modes.
This difference becomes critical when filming venues with:
- Bright snow-covered peaks in the background
- Shaded architectural details
- Mixed sun and cloud conditions
- Interior-to-exterior transition shots
Your footage will appear flat and desaturated in-camera, but the post-processing flexibility is invaluable for professional delivery.
Mastering Subject Tracking for Venue Tours
The Avata's ActiveTrack system transforms venue documentation from a two-person job into a solo operation.
Setting Up ActiveTrack for Venue Filming
ActiveTrack works best when you follow this sequence:
- Position the Avata at your desired starting height and distance
- Frame your subject (building, pathway, or talent) in the center of the display
- Draw a box around the tracking target using the DJI Fly app
- Select tracking mode: Trace (follow behind), Profile (maintain side angle), or Spotlight (stationary tracking)
- Set maximum speed to 15-20 mph for smooth, cinematic movement
For venue walkthroughs, I prefer Profile mode at a 45-degree angle to the walking path. This captures both the talent and the surrounding venue architecture simultaneously.
Expert Insight: ActiveTrack struggles with subjects wearing colors that match the background. When filming talent at mountain venues, I request they wear contrasting colors—typically red, orange, or bright blue against natural backgrounds.
Combining ActiveTrack with Manual Inputs
The Avata allows simultaneous tracking and manual altitude adjustments. This hybrid approach creates dynamic reveal shots:
- Start with ActiveTrack locked on a walking subject
- Gradually increase altitude as they approach the venue
- The system maintains horizontal tracking while you control the vertical reveal
This technique produces professional "approach and reveal" shots that would otherwise require a dedicated camera operator.
QuickShots: Automated Cinematic Sequences
QuickShots provide repeatable, professional camera movements without manual piloting. For mountain venue work, three modes prove most valuable.
Dronie
The Dronie shot flies backward and upward while keeping the subject centered. For venues, this creates classic establishing shots that reveal the property within its mountain context.
Best practices for venue Dronies:
- Start 10-15 feet from the main entrance
- Set distance to maximum for dramatic reveals
- Ensure the flight path is clear of trees and power lines
- Shoot during golden hour for optimal lighting
Circle
Circle mode orbits the subject at a fixed distance and altitude. This works exceptionally well for:
- Showcasing venue architecture from all angles
- Revealing surrounding mountain views
- Creating seamless looping content for social media
Set the orbit radius to 50-80 feet for most venue buildings to capture both detail and context.
Helix
Helix combines circular motion with ascending altitude, creating a spiral reveal. This mode excels at mountain venues where you want to emphasize both the property and the dramatic elevation.
Creating Hyperlapse Content for Venue Marketing
Hyperlapse mode captures time-compressed footage that showcases venues across changing conditions. Mountain locations benefit enormously from this technique.
Hyperlapse Settings for Mountain Venues
| Parameter | Setting | Notes |
|---|---|---|
| Mode | Circle or Waypoint | Waypoint for complex paths |
| Interval | 2-3 seconds | Balances smoothness and duration |
| Duration | 10-15 seconds final | Requires 20-45 minutes of flight |
| Speed | Slow | Smoother results in post |
Waypoint Hyperlapse Strategy
For comprehensive venue coverage, I program 5-7 waypoints that create a complete property tour:
- Distant establishing position
- Approach angle highlighting entrance
- Side profile showing venue depth
- Rear angle capturing mountain backdrop
- Return path with elevated perspective
The Avata flies this path repeatedly, capturing frames at set intervals. The resulting footage compresses 30+ minutes of real time into 10-15 seconds of smooth, cinematic content.
Obstacle Avoidance: Configuration for Mountain Terrain
The Avata's obstacle avoidance system requires specific configuration for mountain venue work.
Recommended Avoidance Settings
- Enable all sensors before flight
- Set avoidance behavior to "Brake" rather than "Bypass" near structures
- Adjust sensitivity to "High" in areas with thin branches or wires
- Monitor sensor status throughout the flight via the app overlay
When to Disable Obstacle Avoidance
Certain shots require temporarily disabling avoidance:
- Flying through doorways or windows
- Threading between closely spaced trees
- Capturing interior-to-exterior transitions
- Executing precise proximity shots of architectural details
Always re-enable avoidance immediately after completing these maneuvers.
Common Mistakes to Avoid
Ignoring wind patterns around structures. Mountain venues create localized wind acceleration and turbulence. Scout wind behavior before committing to complex flight paths.
Filming only during midday. Harsh overhead lighting flattens mountain terrain and creates unflattering shadows on buildings. Schedule shoots for golden hour or overcast conditions.
Neglecting battery temperature. Cold mountain temperatures reduce battery capacity by 20-30%. Keep spare batteries warm in interior pockets and monitor voltage closely.
Over-relying on automated modes. QuickShots and ActiveTrack produce excellent results, but manual flying captures unique angles that automated systems cannot achieve.
Skipping location scouting. Walk the venue property before flying. Identify power lines, guy wires, and other hazards that may not be visible from the air.
Forgetting audio considerations. The Avata's propeller noise contaminates ambient audio. Plan to capture audio separately or use the footage for music-backed content only.
Frequently Asked Questions
How does the Avata perform at high altitudes?
The Avata operates reliably up to 16,404 feet above sea level. However, thinner air reduces propeller efficiency, decreasing flight time by approximately 10-15% at elevations above 8,000 feet. Plan shorter flights and carry additional batteries for high-altitude venue work.
Can I fly the Avata indoors at mountain venues?
Yes, with precautions. Disable GPS positioning and switch to Attitude mode for indoor flights. The obstacle avoidance sensors function normally indoors, but be aware of reflective surfaces like windows and mirrors that may confuse the vision system.
What's the best way to capture both interior and exterior in one shot?
Use manual flight mode with obstacle avoidance temporarily disabled. Start inside the venue, fly slowly toward an open door or window, and transition smoothly to exterior flight. Re-enable obstacle avoidance once clear of the structure. This technique requires practice but produces stunning transitional footage.
Ready for your own Avata? Contact our team for expert consultation.