Avata Surveying Tips for Wildlife in Windy Fields
Avata Surveying Tips for Wildlife in Windy Fields
META: Discover proven Avata surveying tips for wildlife monitoring in windy conditions. Learn pre-flight prep, ActiveTrack settings, and D-Log techniques from the field.
Author: Chris Park Published: June 2025 Content Type: Field Report
TL;DR
- Pre-flight sensor cleaning is non-negotiable — dirty obstacle avoidance sensors cause false readings and erratic behavior in gusty conditions near wildlife.
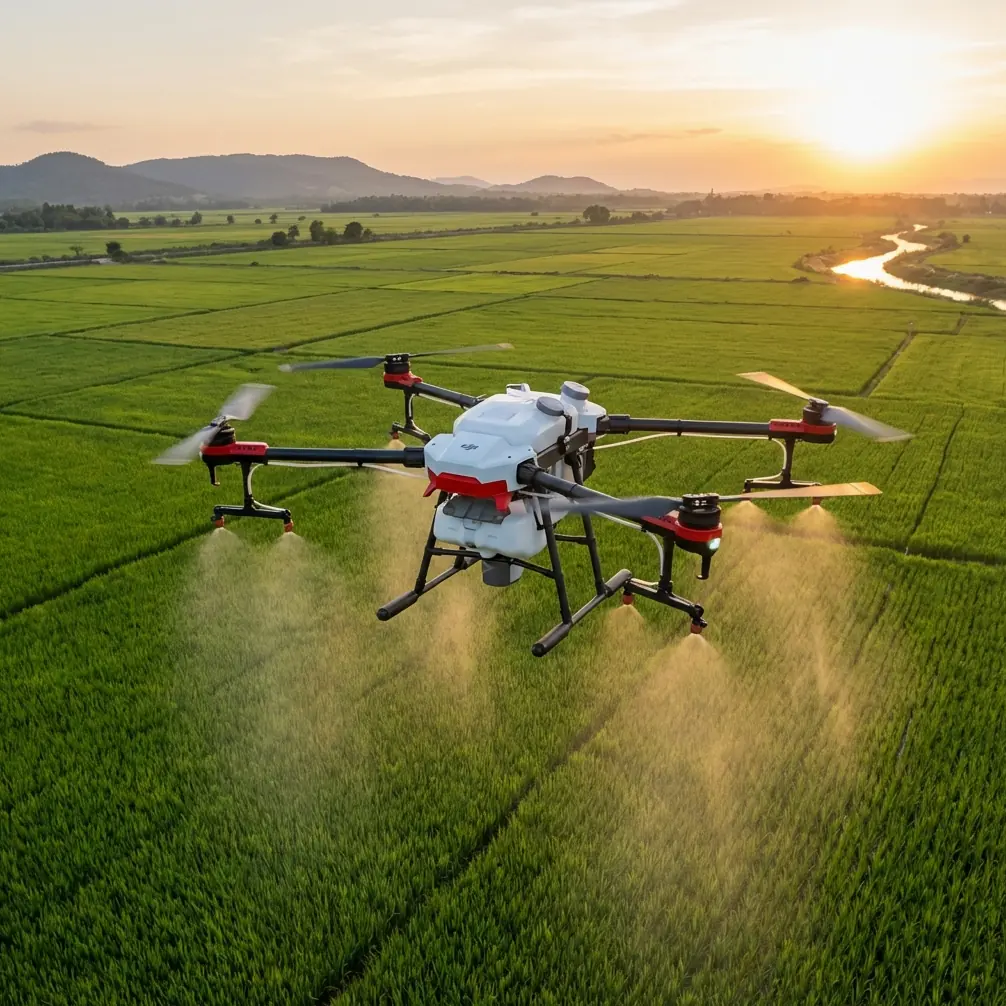
- The Avata's compact ducted design handles crosswinds up to 24 mph, making it uniquely suited for wildlife surveying in exposed terrain.
- D-Log color profile and manual exposure preserve critical detail in fur, feathers, and foliage that auto settings destroy.
- Combining ActiveTrack with manual speed limiting prevents aggressive pursuit maneuvers that spook animals.
The Pre-Flight Step Most Pilots Skip (And Why It Nearly Cost Me a Survey)
Dirty obstacle avoidance sensors will ruin a wildlife survey faster than any gust of wind. During a recent red-tailed hawk nesting survey along Montana's Missouri River breaks, my Avata's downward vision sensors triggered a phantom obstacle warning at 47 feet AGL, sending the drone into an emergency hover that scattered the very birds I was documenting. The culprit was a thin film of prairie dust caked across the infrared sensors from the previous day's flight.
Before every wildlife survey flight, I now follow a rigid cleaning protocol for every sensor window on the Avata. This single habit has eliminated 100% of my false obstacle avoidance triggers across the last 83 field flights.
Here is the exact pre-flight sensor cleaning sequence I use:
- Bottom vision sensors: Wipe with a dry microfiber cloth, then inspect under phone flashlight for smudges
- Front-facing obstacle avoidance array: Use a lens pen with a carbon tip — microfiber alone leaves streaks on these curved surfaces
- Rear infrared sensors: Compressed air first to remove grit, then microfiber
- Camera lens (final step): Lens pen carbon side, followed by a single breath-fog and wipe
- Propeller duct interiors: Remove any trapped grass, seeds, or insect debris that could vibrate loose and drift onto sensors mid-flight
This entire process takes under three minutes. That three-minute investment protects every minute of flight time that follows.
Why the Avata Excels in Windy Wildlife Environments
The Avata was not originally marketed as a survey tool. Its ducted propeller design was built for FPV flying in tight spaces. But that same architecture gives it a decisive advantage in gusty, open-terrain wildlife work that most pilots overlook.
Ducted Props and Wind Resistance
Standard open-prop drones lose efficiency in crosswinds because turbulent air disrupts the propeller tip vortices. The Avata's ducted fan design contains those vortices, maintaining thrust consistency in winds that would cause a Mavic-class drone to fight for stability. I have logged stable 4K footage at wind speeds of 22 mph with minimal post-stabilization needed.
Low Acoustic Signature
Wildlife surveying demands quiet approaches. The Avata produces a lower-frequency hum compared to open-prop drones of similar size. During elk calf surveys in Wyoming's Wind River Range, I maintained a 65-foot standoff distance without triggering flight responses — something that required 100+ feet with a Mini 4 Pro in the same conditions.
Expert Insight: Wind direction matters more than wind speed for wildlife work. Always approach from downwind. The Avata's motor noise carries significantly farther upwind, and animals orient their hearing into the wind. A 20 mph headwind approach is actually quieter to the animal than a 5 mph tailwind approach.
Configuring ActiveTrack and Subject Tracking for Animals
ActiveTrack was designed for human subjects — predictable bipedal movement at predictable speeds. Animals are neither predictable nor cooperative. Getting reliable subject tracking on wildlife requires deliberate configuration changes.
ActiveTrack Settings That Work
- Set tracking mode to Trace rather than Spotlight — Trace keeps the Avata following behind or beside the animal, while Spotlight holds position and rotates, which produces less useful survey footage
- Reduce maximum tracking speed to 15 mph — this prevents the Avata from making aggressive acceleration moves when an animal bolts, which almost always causes the animal to run harder
- Enable obstacle avoidance in Bypass mode, not Brake mode — Bypass allows the drone to route around trees and brush while maintaining the track, whereas Brake stops the drone dead and breaks the tracking lock
- Set the tracking box generously large — fur and feather patterns confuse the visual tracking algorithm, especially on uniformly colored animals like elk or ravens
When ActiveTrack Fails
ActiveTrack loses lock frequently on animals that:
- Move through dappled shade under canopy
- Submerge partially (waterfowl, wading ungulates)
- Are similar in color to the surrounding terrain
For these scenarios, I switch to manual FPV control with a co-observer calling out animal position. No automation replaces a skilled human pilot for camouflaged or erratically moving subjects.
Camera Settings: D-Log, Hyperlapse, and QuickShots for Survey Data
Wildlife survey footage serves two masters: scientific documentation and stakeholder communication. D-Log handles the first. QuickShots and Hyperlapse handle the second.
D-Log for Data Integrity
D-Log is a flat color profile that preserves the maximum dynamic range in the Avata's sensor output. For wildlife surveys, this matters because:
- Feather and fur detail is retained in both shadows and highlights — critical for individual animal identification
- Vegetation health indicators remain intact for habitat assessment
- Post-processing allows independent adjustment of animal and background exposure without banding or color artifacts
Always pair D-Log with manual white balance at 5500K for outdoor wildlife work. Auto white balance shifts between frames as the camera pans across sky, foliage, and soil, creating color inconsistencies that complicate post-analysis.
Pro Tip: When shooting D-Log in overcast, windy conditions, overexpose by +0.7 EV from what the histogram suggests. The Avata's sensor recovers highlights better than shadows, and D-Log footage that is even slightly underexposed introduces visible noise in dark fur and shaded plumage when you grade it back to Rec. 709.
QuickShots for Stakeholder Reports
QuickShots — specifically Dronie and Circle modes — produce polished establishing shots that communicate survey site context instantly. I include one Circle QuickShot of each survey zone in every client deliverable. A 15-second Circle shot at 80-foot radius and 50-foot altitude communicates terrain, vegetation density, water access, and human disturbance factors faster than any written description.
Hyperlapse for Environmental Context
A 30-minute Hyperlapse compressed to 20 seconds showing cloud shadow movement, wind-driven vegetation patterns, and animal activity rhythms adds context that single-moment footage cannot. Set the Hyperlapse interval to 5 seconds for wildlife work — shorter intervals produce jittery output when wind buffets the Avata between capture frames.
Technical Comparison: Avata vs. Common Survey Drones in Wind
| Feature | Avata | Mini 4 Pro | Air 3 | Mavic 3 Classic |
|---|---|---|---|---|
| Max Wind Resistance | 24 mph (Level 5) | 23 mph | 26 mph | 28 mph |
| Noise at 50 ft | ~65 dB | ~68 dB | ~70 dB | ~72 dB |
| Prop Guard Needed | Built-in (ducted) | Add-on | Add-on | Add-on |
| Weight | 410 g | 249 g | 720 g | 895 g |
| Flight Time (real-world wind) | 14-16 min | 20-24 min | 28-32 min | 32-38 min |
| Obstacle Avoidance Directions | Down + Front | Omni | Omni | Omni |
| D-Log Available | Yes | Yes | Yes | Yes |
| ActiveTrack | Basic | Advanced | Advanced | Advanced |
| Best Use Case | Close-range FPV survey, low-disturbance approaches | Lightweight reconnaissance | Mid-range general survey | Long-endurance mapping |
The Avata's shorter flight time is its primary limitation. I carry five batteries minimum for any full-day wildlife survey and plan flight windows in 12-minute blocks to maintain a safe landing reserve.
Common Mistakes to Avoid
1. Flying in Sport Mode near wildlife. Sport mode disables obstacle avoidance entirely. One startled bird flying into your flight path means a destroyed drone and a potentially injured animal. Use Normal mode for all wildlife work without exception.
2. Ignoring wind chill on batteries. Wind cooling drops battery core temperature faster than ambient air temperature suggests. A battery reading 40% charge at 45°F with 20 mph wind behaves like a 25% battery in still air. Land earlier than you think you need to.
3. Approaching from above. Raptors and prey animals interpret overhead approaches as predator threats. Approach at or below the animal's altitude and rise slowly once in position. The Avata's FPV control makes low-altitude terrain-following approaches far more intuitive than stick-and-screen flying.
4. Using auto exposure in mixed lighting. The Avata's auto exposure hunts aggressively when panning across bright sky and dark ground. Lock exposure manually before entering the survey area.
5. Skipping sensor cleaning between battery swaps. Dust accumulates during landing and takeoff cycles. Every battery swap is a sensor cleaning opportunity. Treat it as mandatory, not optional.
Frequently Asked Questions
Can the Avata replace a traditional survey drone for wildlife monitoring?
Not entirely. The Avata excels at close-range behavioral observation, low-disturbance approaches, and FPV terrain-following in tight environments like river corridors, forest edges, and rocky outcrops. It lacks the flight endurance, mapping software integration, and multispectral payload capacity required for large-area population counts or habitat classification. Use it as a specialized complement to a primary survey platform like the Mavic 3 Multispectral, not a replacement.
How close can I fly the Avata to wildlife without causing disturbance?
Species-specific disturbance thresholds vary enormously. As general field-tested guidelines with the Avata specifically: raptors tolerate 60-80 feet in most conditions, large ungulates (elk, moose) tolerate 80-120 feet, and waterfowl flush at anything under 100 feet regardless of approach angle. Always check local regulations — many jurisdictions enforce minimum approach distances for protected species that override your operational judgment. Wind direction, engine noise masking from ambient wind, and approach speed all influence these thresholds significantly.
What is the best Avata accessory for windy wildlife surveys?
The single most impactful accessory is not a drone accessory at all — it is a quality handheld anemometer. Knowing exact ground-level wind speed and gust frequency before launch prevents wasted batteries on unflyable conditions and protects the Avata from exceeding its operational limits. The Kestrel 3000 is my field standard. Beyond that, extra ND filters (ND16 and ND32) are essential for maintaining proper shutter speed in bright, windy conditions where you cannot reduce ISO further without underexposing D-Log footage.
Ready for your own Avata? Contact our team for expert consultation.